What is it?
You just finished weeding this intricate and beautiful graphic. A pretty pink Tervis sits next to you, ready to be adorned with aforementioned intricate and beautiful graphic. But, how are you going to get this detailed & delicate graphic from the release liner to the Tervis without disaster?
That’s where transfer tape comes in! Transfer tape is easy to use and can save you a lot of time & frustration when crafting.
Transfer tape does exactly what it sounds like: it allows you to easily transfer your plotted vinyl to another surface—all without damaging your design. If you are sticking one little heart onto a mug, that’s pretty easy, right?
One of the joys of using craft vinyl is that it is sticky but it is also flexible so it can adhere to a lot of different surfaces: curved wine glasses, water bottles, etc. But, that flexibility is also part of what can make vinyl so hard to work with: it’s easy to mess up when trying to place a large graphic unless you do it all at once. That’s where transfer tape makes your life easier!
What types are there?
Paper
Paper transfer tape is exactly what the name says: paper tape with an adhesive backing. It is very similar to masking tape. While it is more flexible and tends to be cheaper, the downside is that it is not transparent.
Clear
Clear tape obviously offers the transparency that paper tape lacks.
Liner, no liner, gridded or not gridded

There are several different types of transfer tape available, each allowing a distinct use for crafters. You can have the option of liner or no liner. There is also the option of having gridded lines to help with placing graphics on straight.
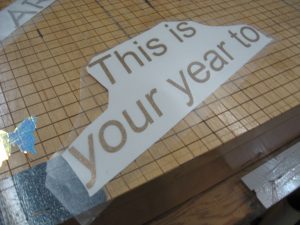
Crystal Clear Gridded
Crystal clear with a grid on the tape helps you line up your projects perfectly.

How do you use it?
Very simply, once you have your graphic or text weeded and ready to be placed, you would just place a piece of transfer tape on top of your graphic.
You will want to use a piece of transfer tape that is larger than your graphic. (If you have a large design that is bigger than your transfer tape, you can use multiple pieces, overlapping slightly to cover the entire graphic). Using a squeegee, apply pressure to your transfer tape to ensure that the vinyl is sticking to the transfer tape. Once it is well-adhered, remove your transfer tape covered graphic from the release liner by starting at one edge (corners are best) and pulling back at a 90 degree angle. Once your graphic has been completely removed from the release liner, apply it to its new home (your tumbler, coffee mug or sign). If you find that your graphic is too big to easily lay by itself we’ll cover a great method on how to that next month.


But, as with everything, there are a few more helpful tips:
- With text or any graphic that has small parts, you want to make sure that the transfer tape is well-adhered to all parts. Think of the little dot in letters like lowercase i or punctuation marks like periods.
- Sometimes, you’ll notice when peeling the vinyl graphic from the vinyl release liner that parts of the graphic didn’t stick to the transfer tape. That’s OK, just go put the transfer tape back down & press down more on the graphic to ensure it sticks.
- A squeegee works best, but if you don’t have one, you can use your thumb to apply pressure to the transfer tape.