Fall is personally my favorite time of the year. The cooler weather brings the opportunity for all the exciting outdoor activities like pumpkin patches and fall festivals, plus Fall also coincides with my birthday! (But, that’s only 50 percent of why I love Fall!)
So, naturally I love decorating for Fall with lots of pumpkins and the beautiful fall colors.
We have a yard flag holder that I snagged on clearance shortly after we bought our house and I absolutely have to change up the flag for every season. I have one for Halloween but wanted something that was better suited for the whole season, not just October. That led me to try out StyleTech’s vinyl for a fall yard sign.
StytleTech’s Ultra Metallic colors seemed like the perfect fit not only because they are the shiniest and most sparkly vinyl in the market, but there is also a great assortment of colors!

Here are the colors I chose for my sign:

I wasn’t sure what kind of material I was going to use as the blank for my sign but ended up using this sign blank.
A few notes about this project:
You have the option of skinning the sign with vinyl or you can leave it as is. It really depends on what you are hoping to achieve for your final project. I personally loved the Ultra 127 Gold color and thought it would really help make the rest of the sign “pop” so I choose to skin the sign blank first.
This project doesn’t require a lot of vinyl. I used one 12 X 12 sheet of each color for the letters and the leaves. If you choose to skin the sign, you will need a little but more than a 12 X 12 sheet, it just depends on how big your sign is.
Now, let’s get down to it!
When it comes to laying a lot of vinyl such as skinning a sign, I like to use the hinge method. I’m hoping to do a more in-depth post about this in the near future, but here are few pictures to help make sure you get the smoothest and cleanest application.

First, you want to lay out your vinyl over the sign, leaving a little extra on all sides.
Take a strip of transfer tape (or premask) and place it in the center. This creates a “hinge” which allows you to work with a smaller amount of vinyl. This method also works best if you have a squeegee.
This tool is commonly used by professionals who are putting wraps on vehicles or large signage on windows. It works great to help get rid of any air bubbles and helps make sure your vinyl adheres correctly and smoothly.
Remove the vinyl from one half of your “hinge” and lay it on the other side like in the picture below.

Starting at your “hinge,” use your squeegee to guide the vinyl to the opposite edges. You can remove the transfer tape (or premask) from the vinyl. Repeat the same process of the other half of the “hinge.”
Once you have applied the vinyl, you will still have a little extra on all the edges. I decided to fold over my vinyl to cover a little of the backside of the sign as opposed to trying to make a perfect cut along the edges.
Here is the sign once it has been skinned.

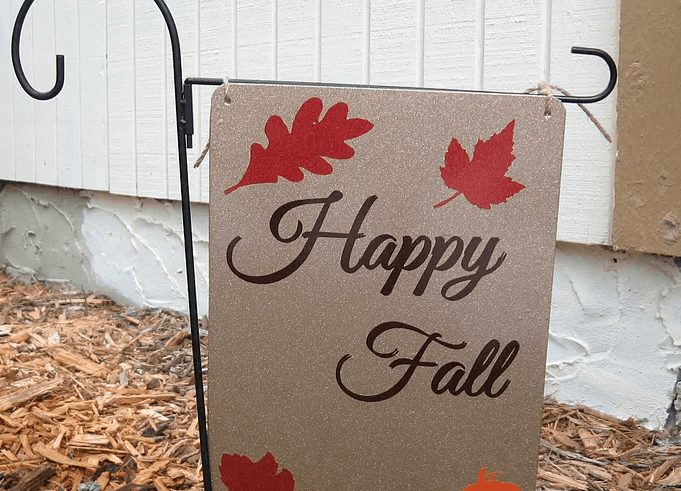
You can use any graphics, font or words you want for the next part of the project. I wanted something simple so I just went with a few leaves, a pumpkin and “Happy Fall.” The words are in Ultra Cinnamon 145, the leaves are Ultra Dark Red 146 and the pumpkin is Ultra Orange 148.
I like to use transfer tape (premask) to apply everything to the sign. Here is where your creativity gets to take over!


Here is my finished Fall yard sign!
